Easy installation
Installing a Tubtara® blind rivet nut is very simple.
Select one of the Tubtara® blind rivet nuts from our extensive product range and a matching setting tool. Take a test workpiece and drill an appropriate hole.
|
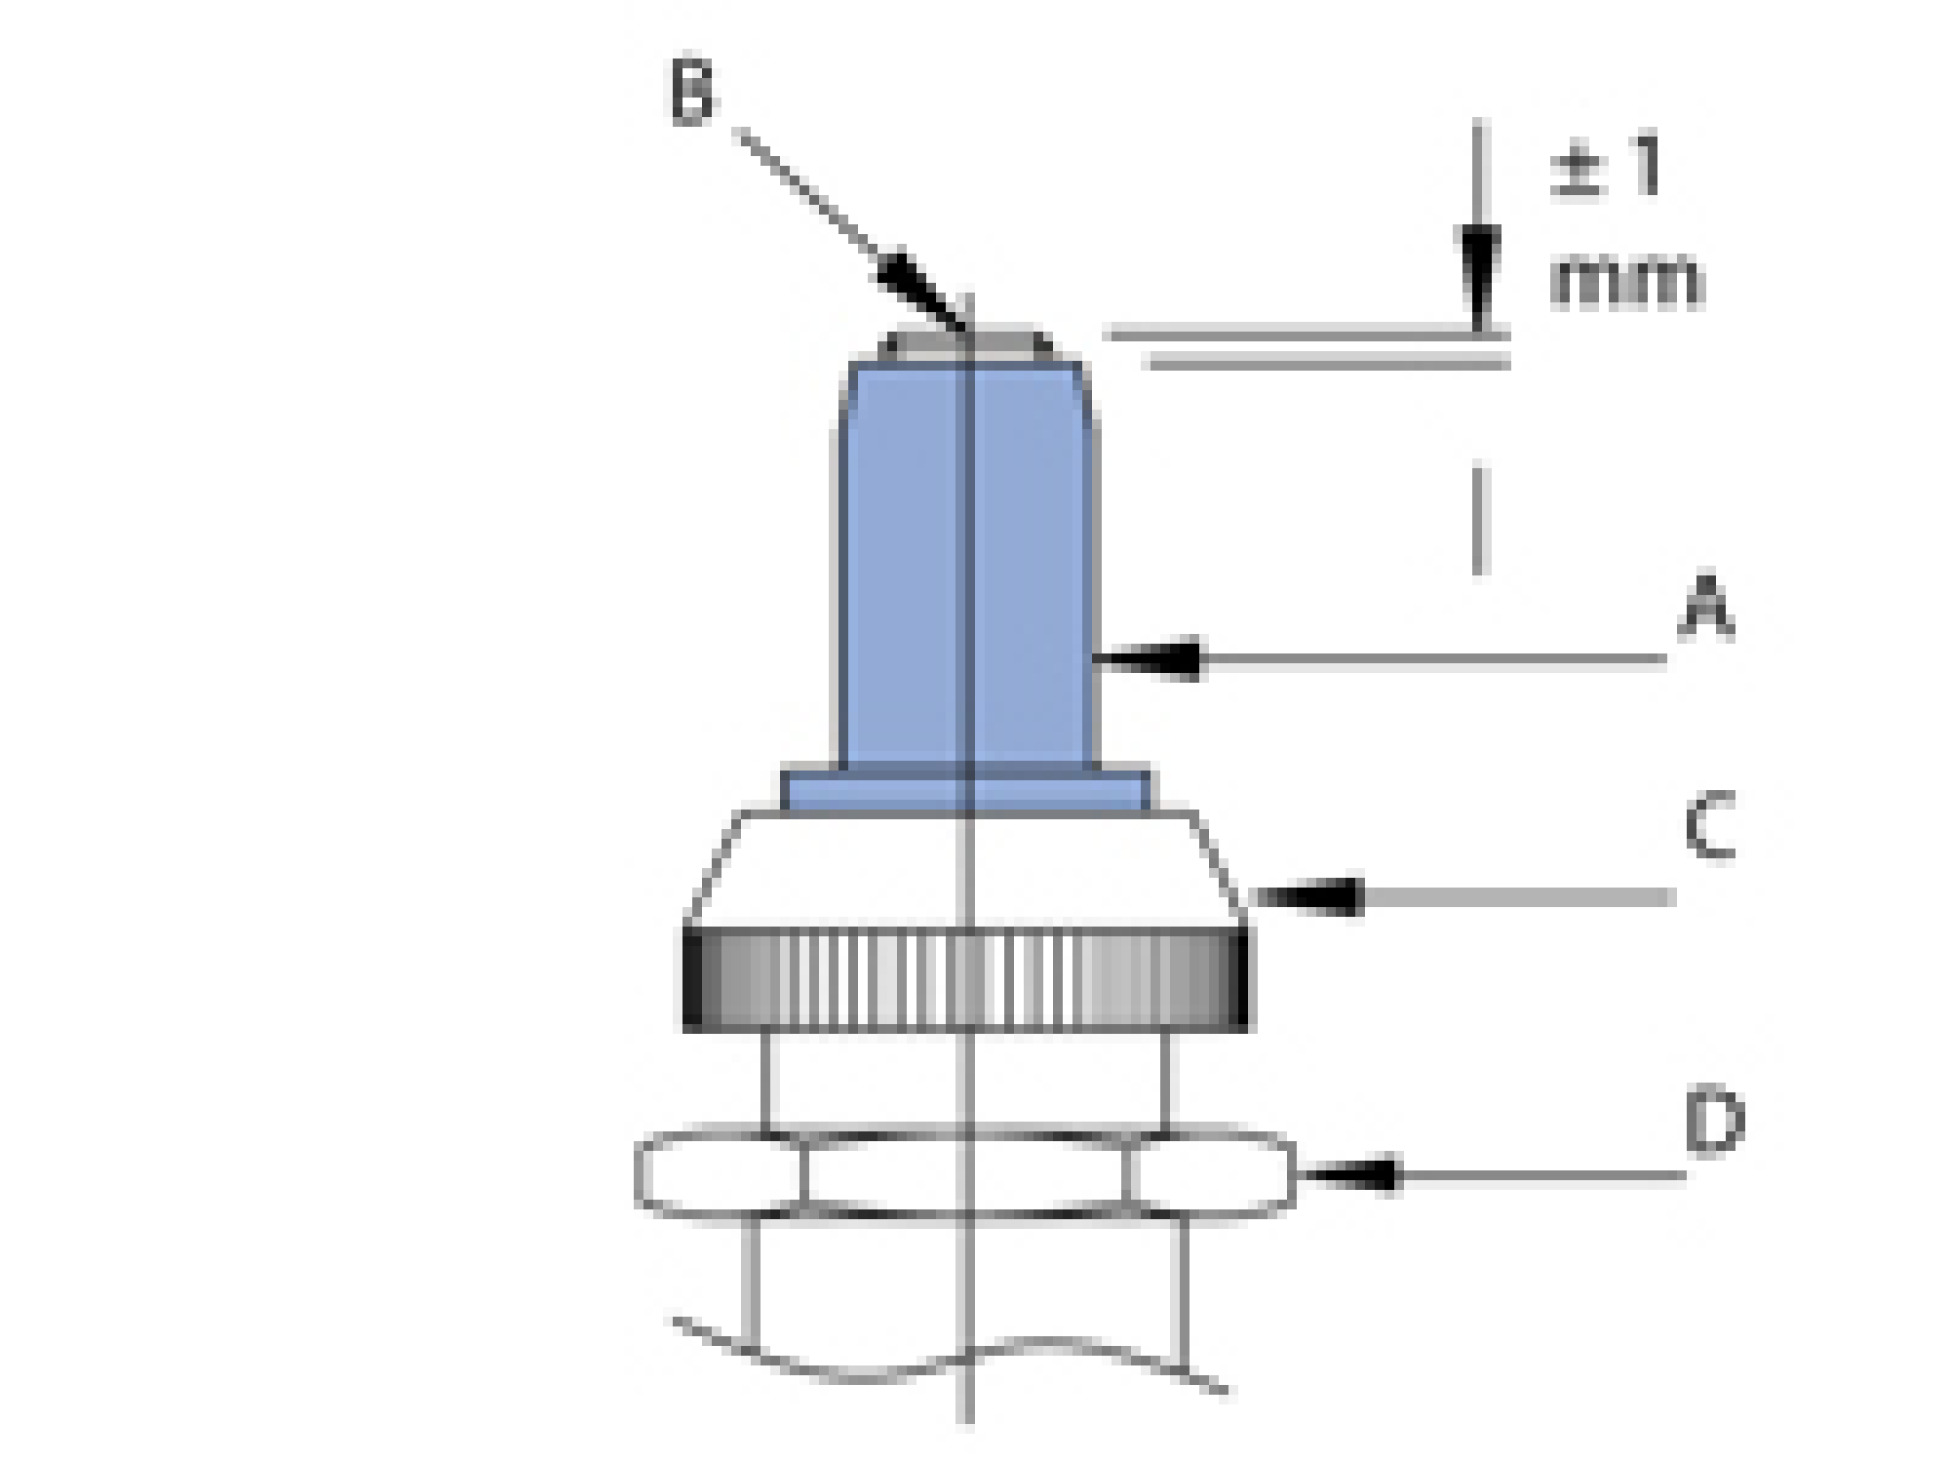
STEP 1 Screw the Tubtara® blind rivet nut (A) on the mandrel (B) of the setting tool. In the case of the open version, the mandrel should protrude about 1 mm. For closed rivet nuts, continue screwing until you feel resistance. Screw the anvil (C) against the head of the Tubtara® and block it with the locking nut (D). |
 |
|
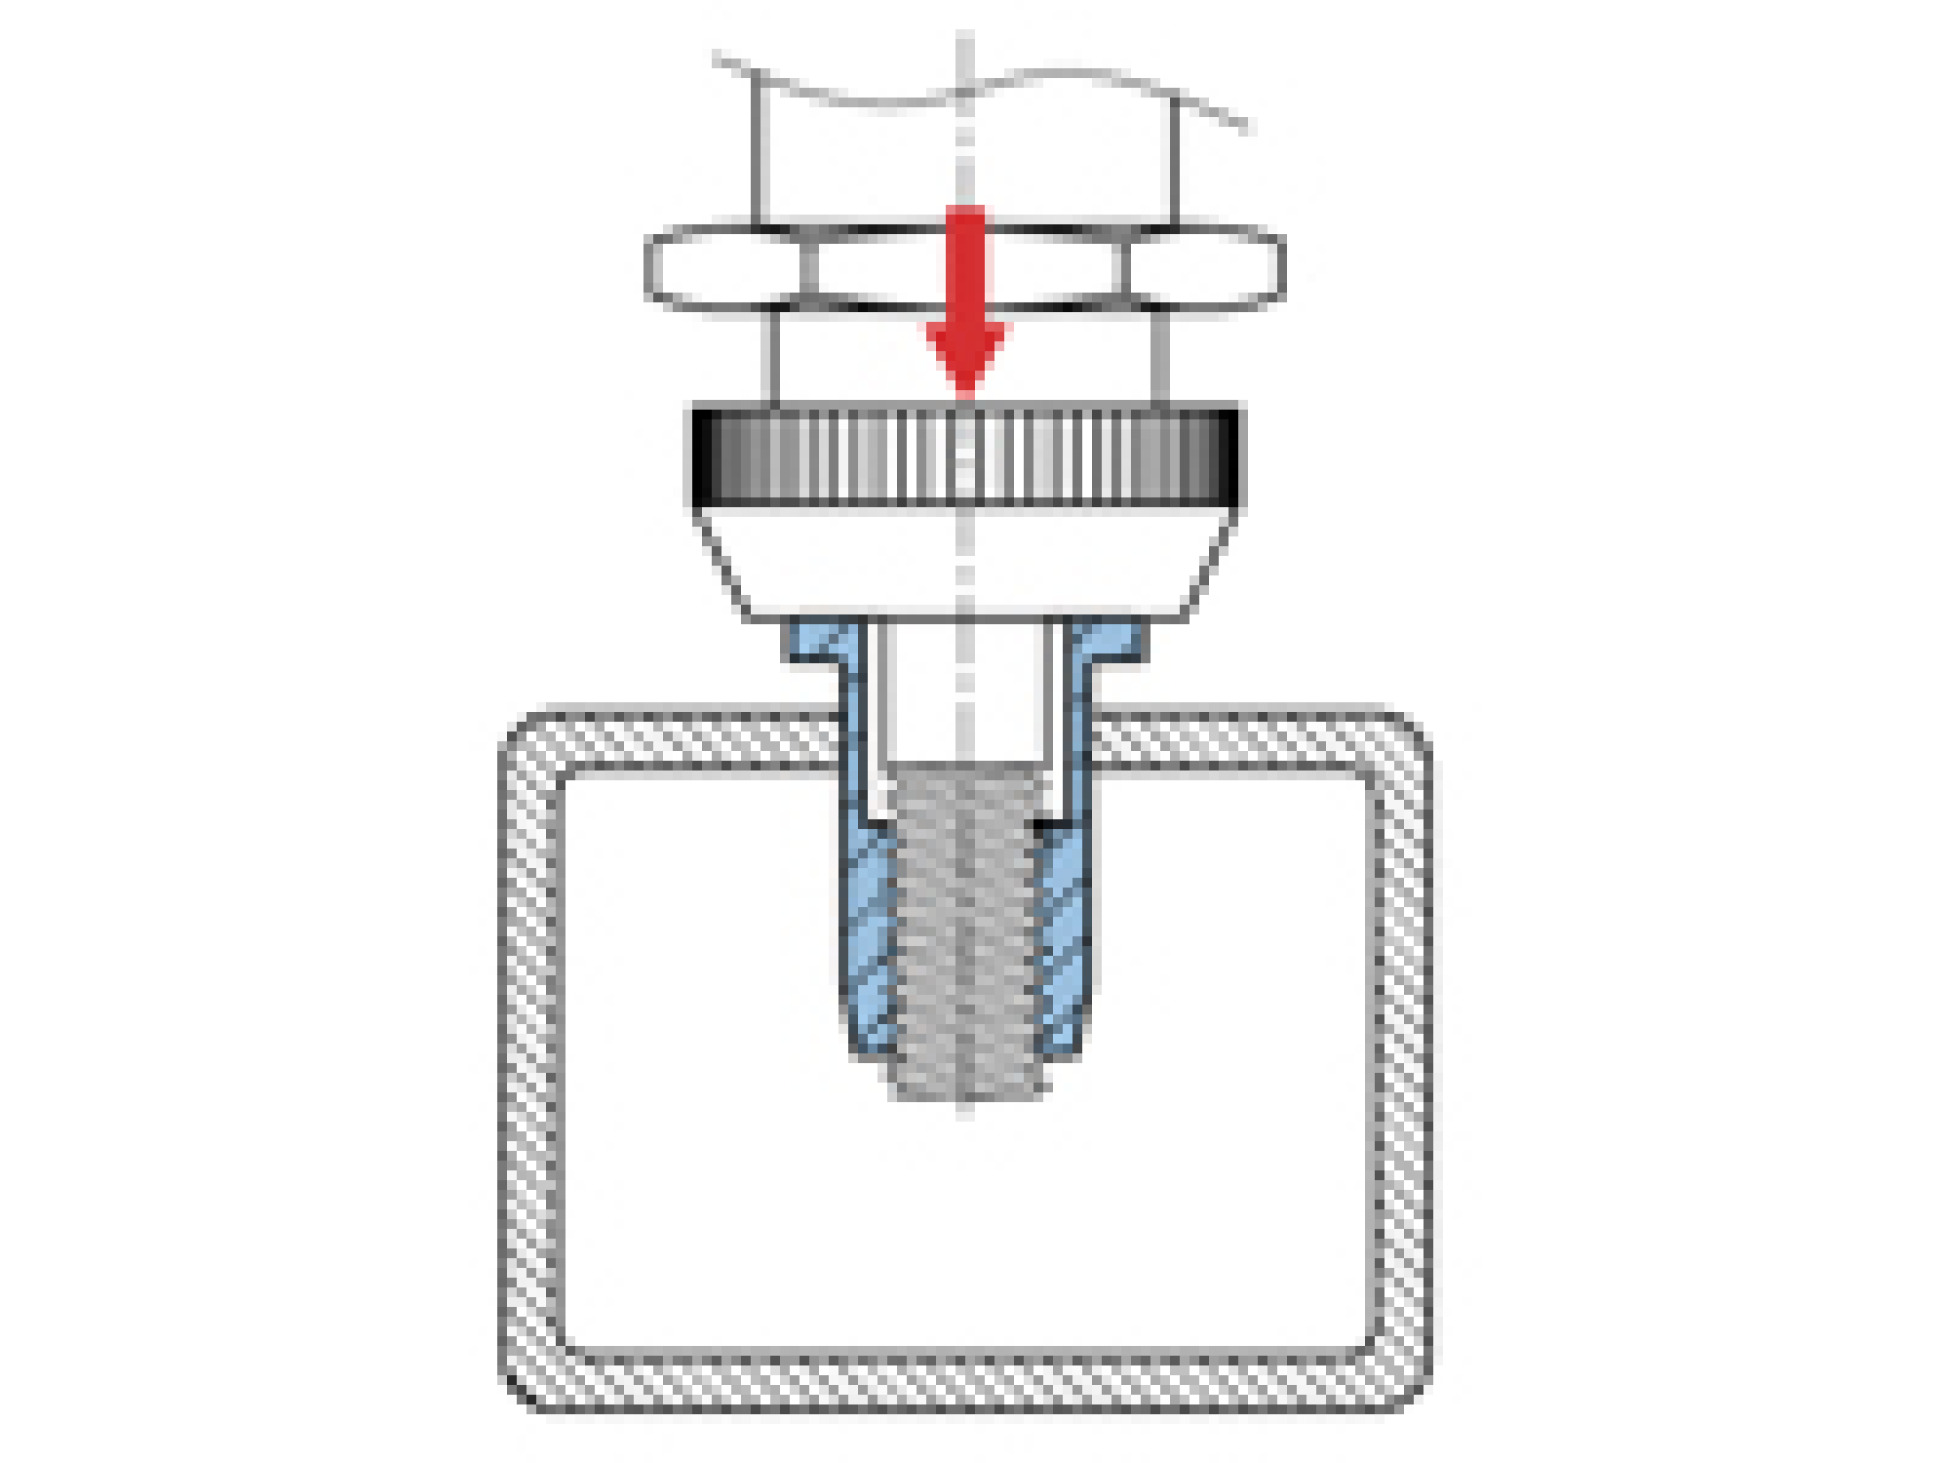
STEP 2 Insert the Tubtara® blind rivet nut, mounted on the setting tool, into the hole of the workpiece. |
 |
|
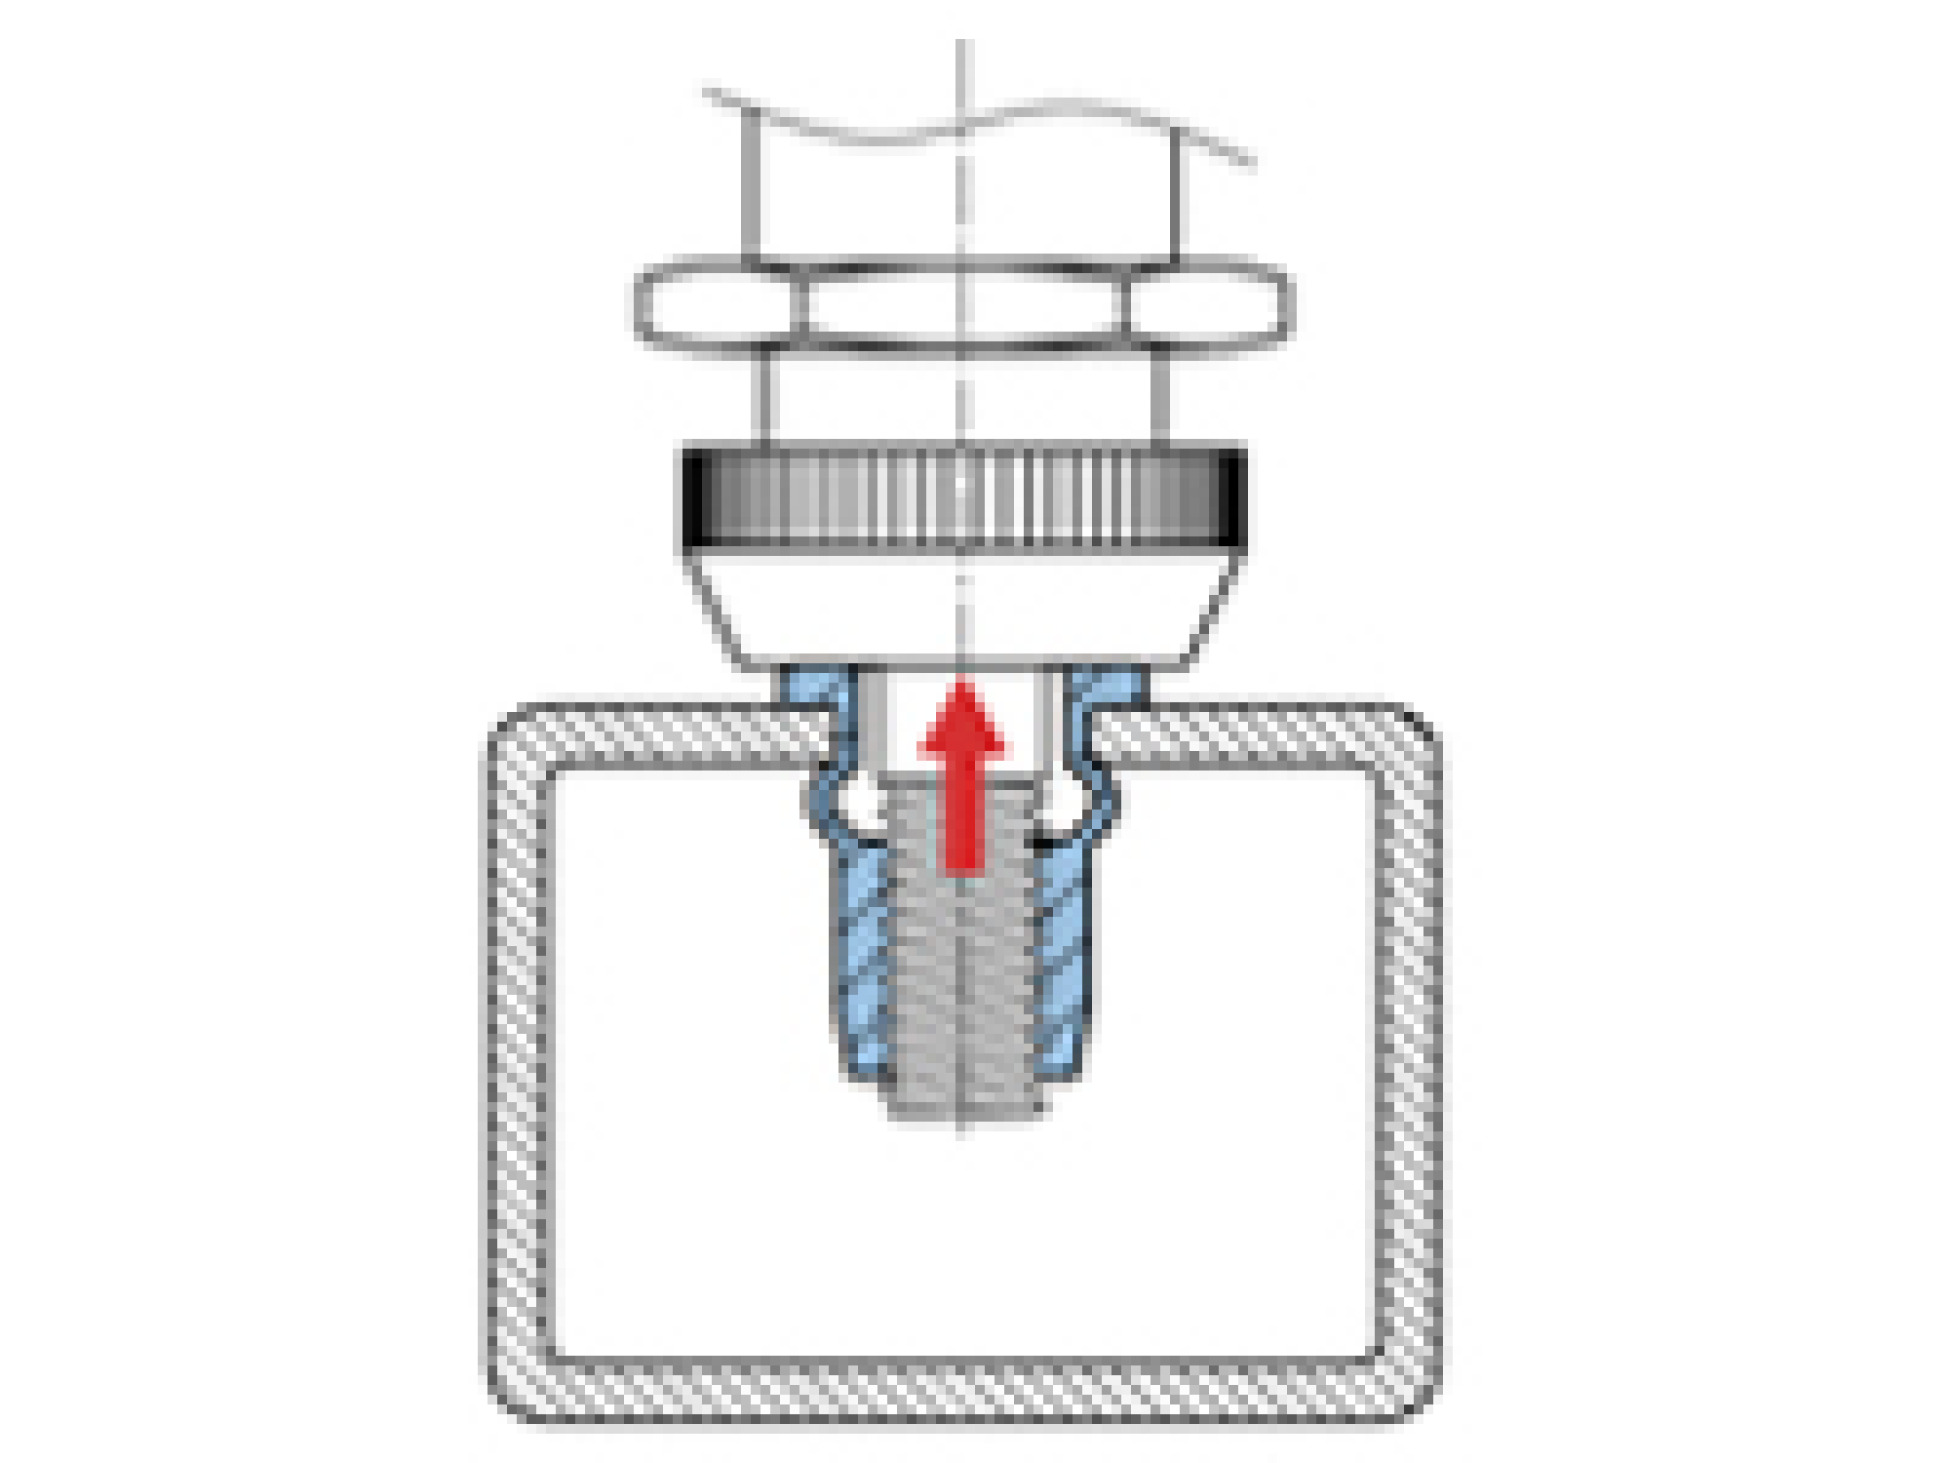
STEP 3 Set the Tubtara®. The Tubtara’s deformation chamber now forms the counter head (bulb) on the underside of the workpiece. |
 |
|
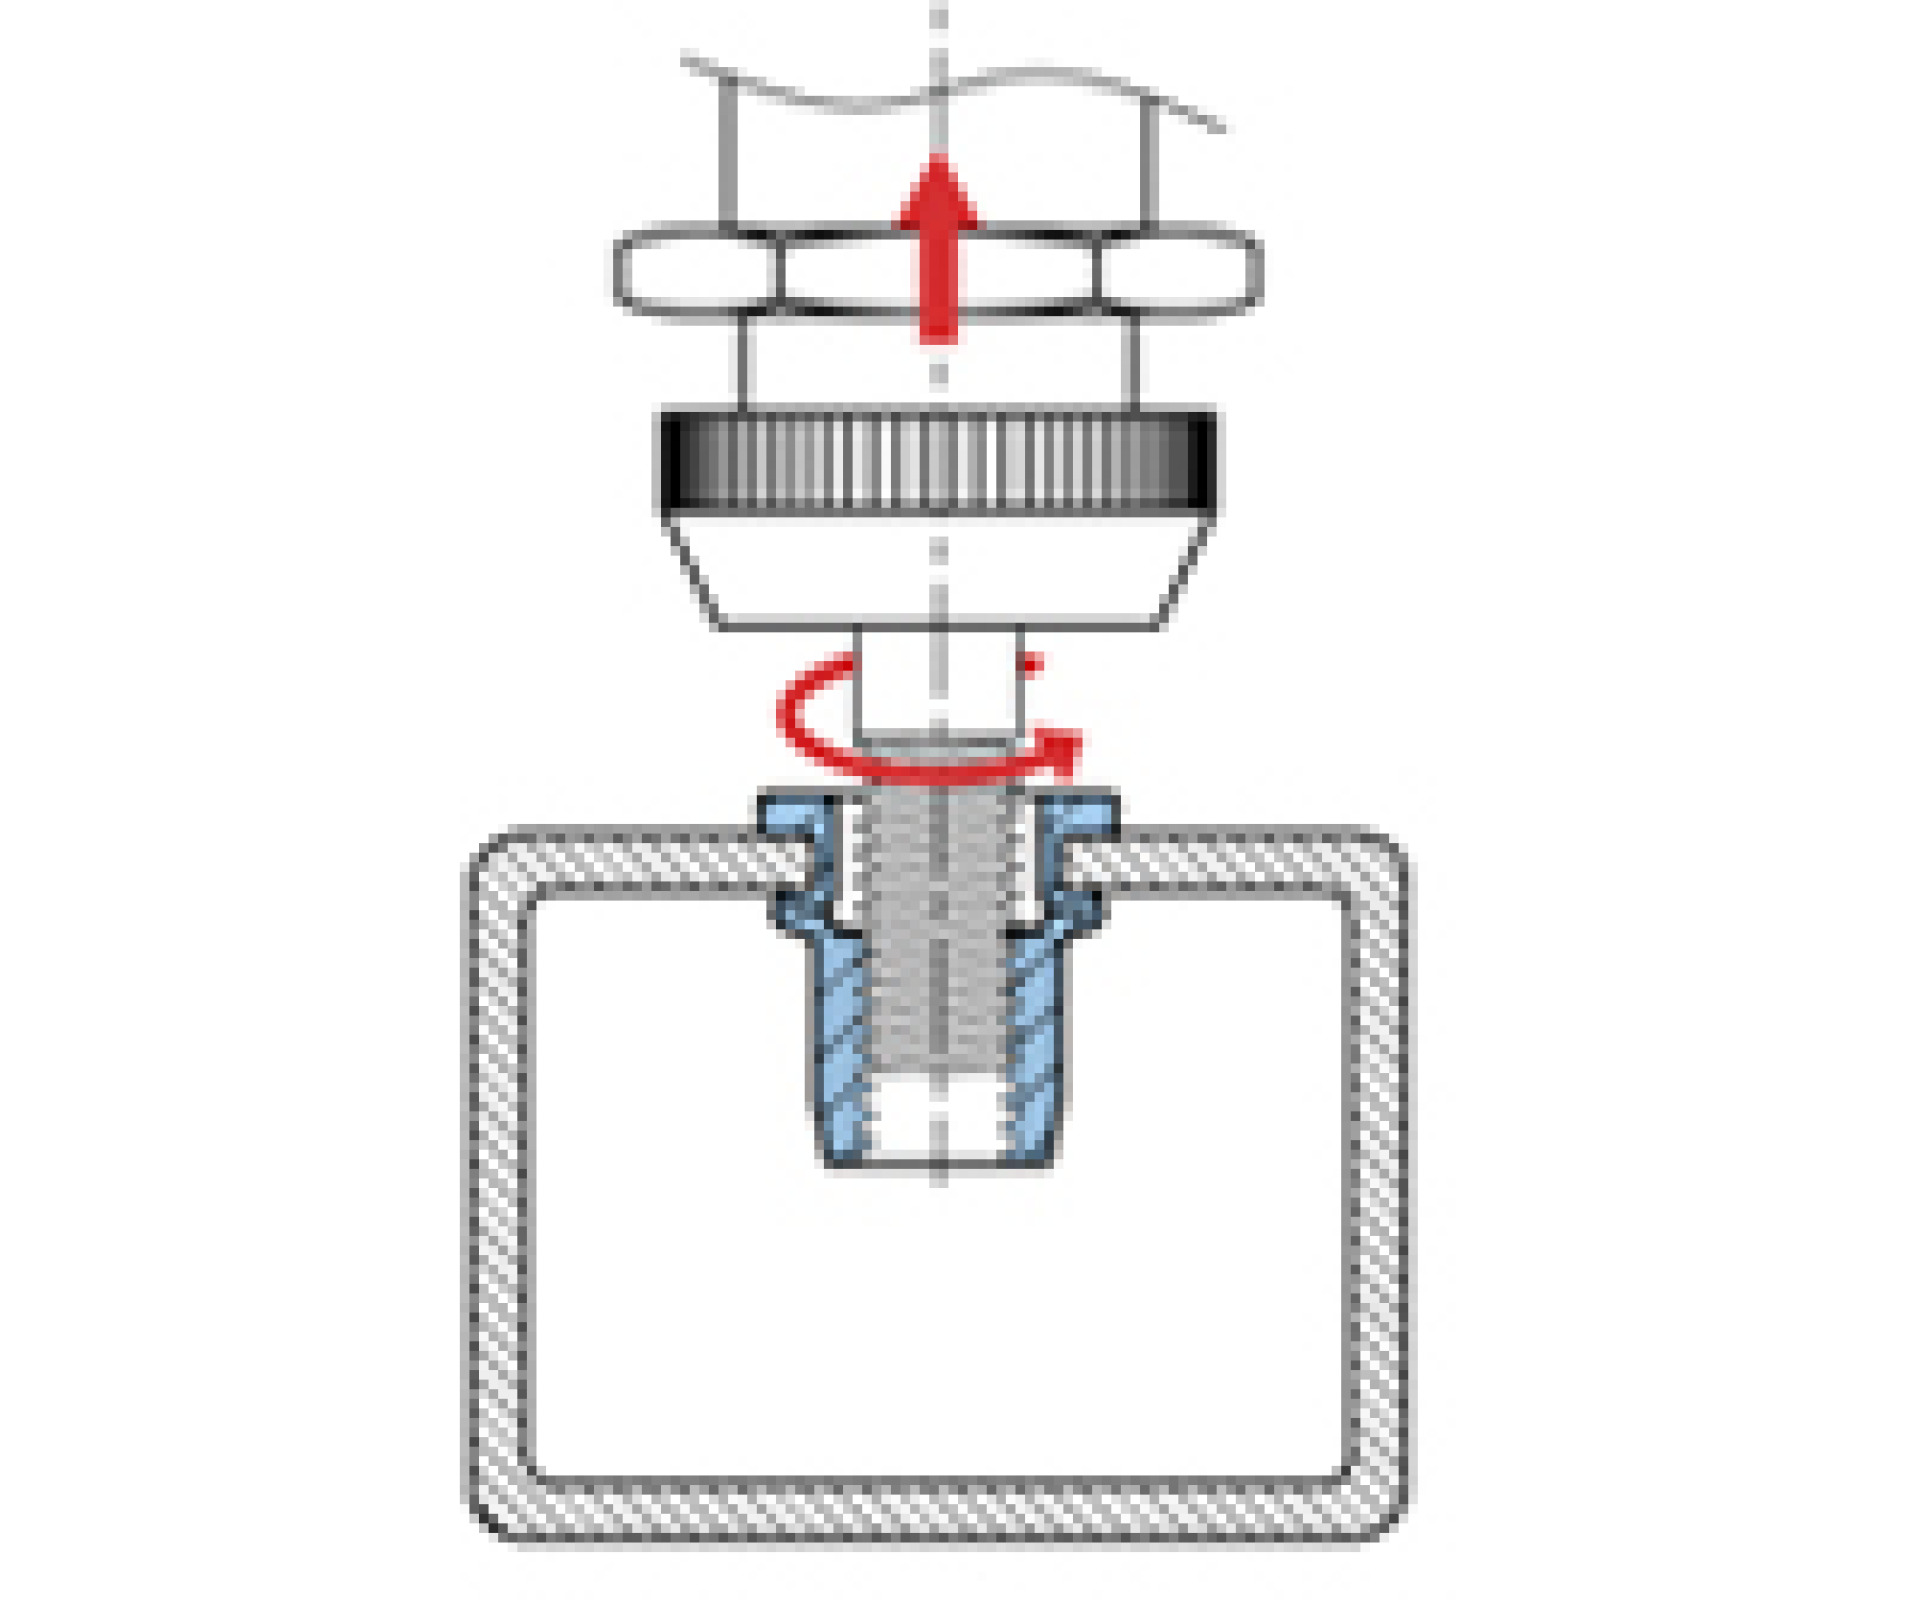
STEP 4 Unscrew the mandrel from the Tubtara®. |
 |
|
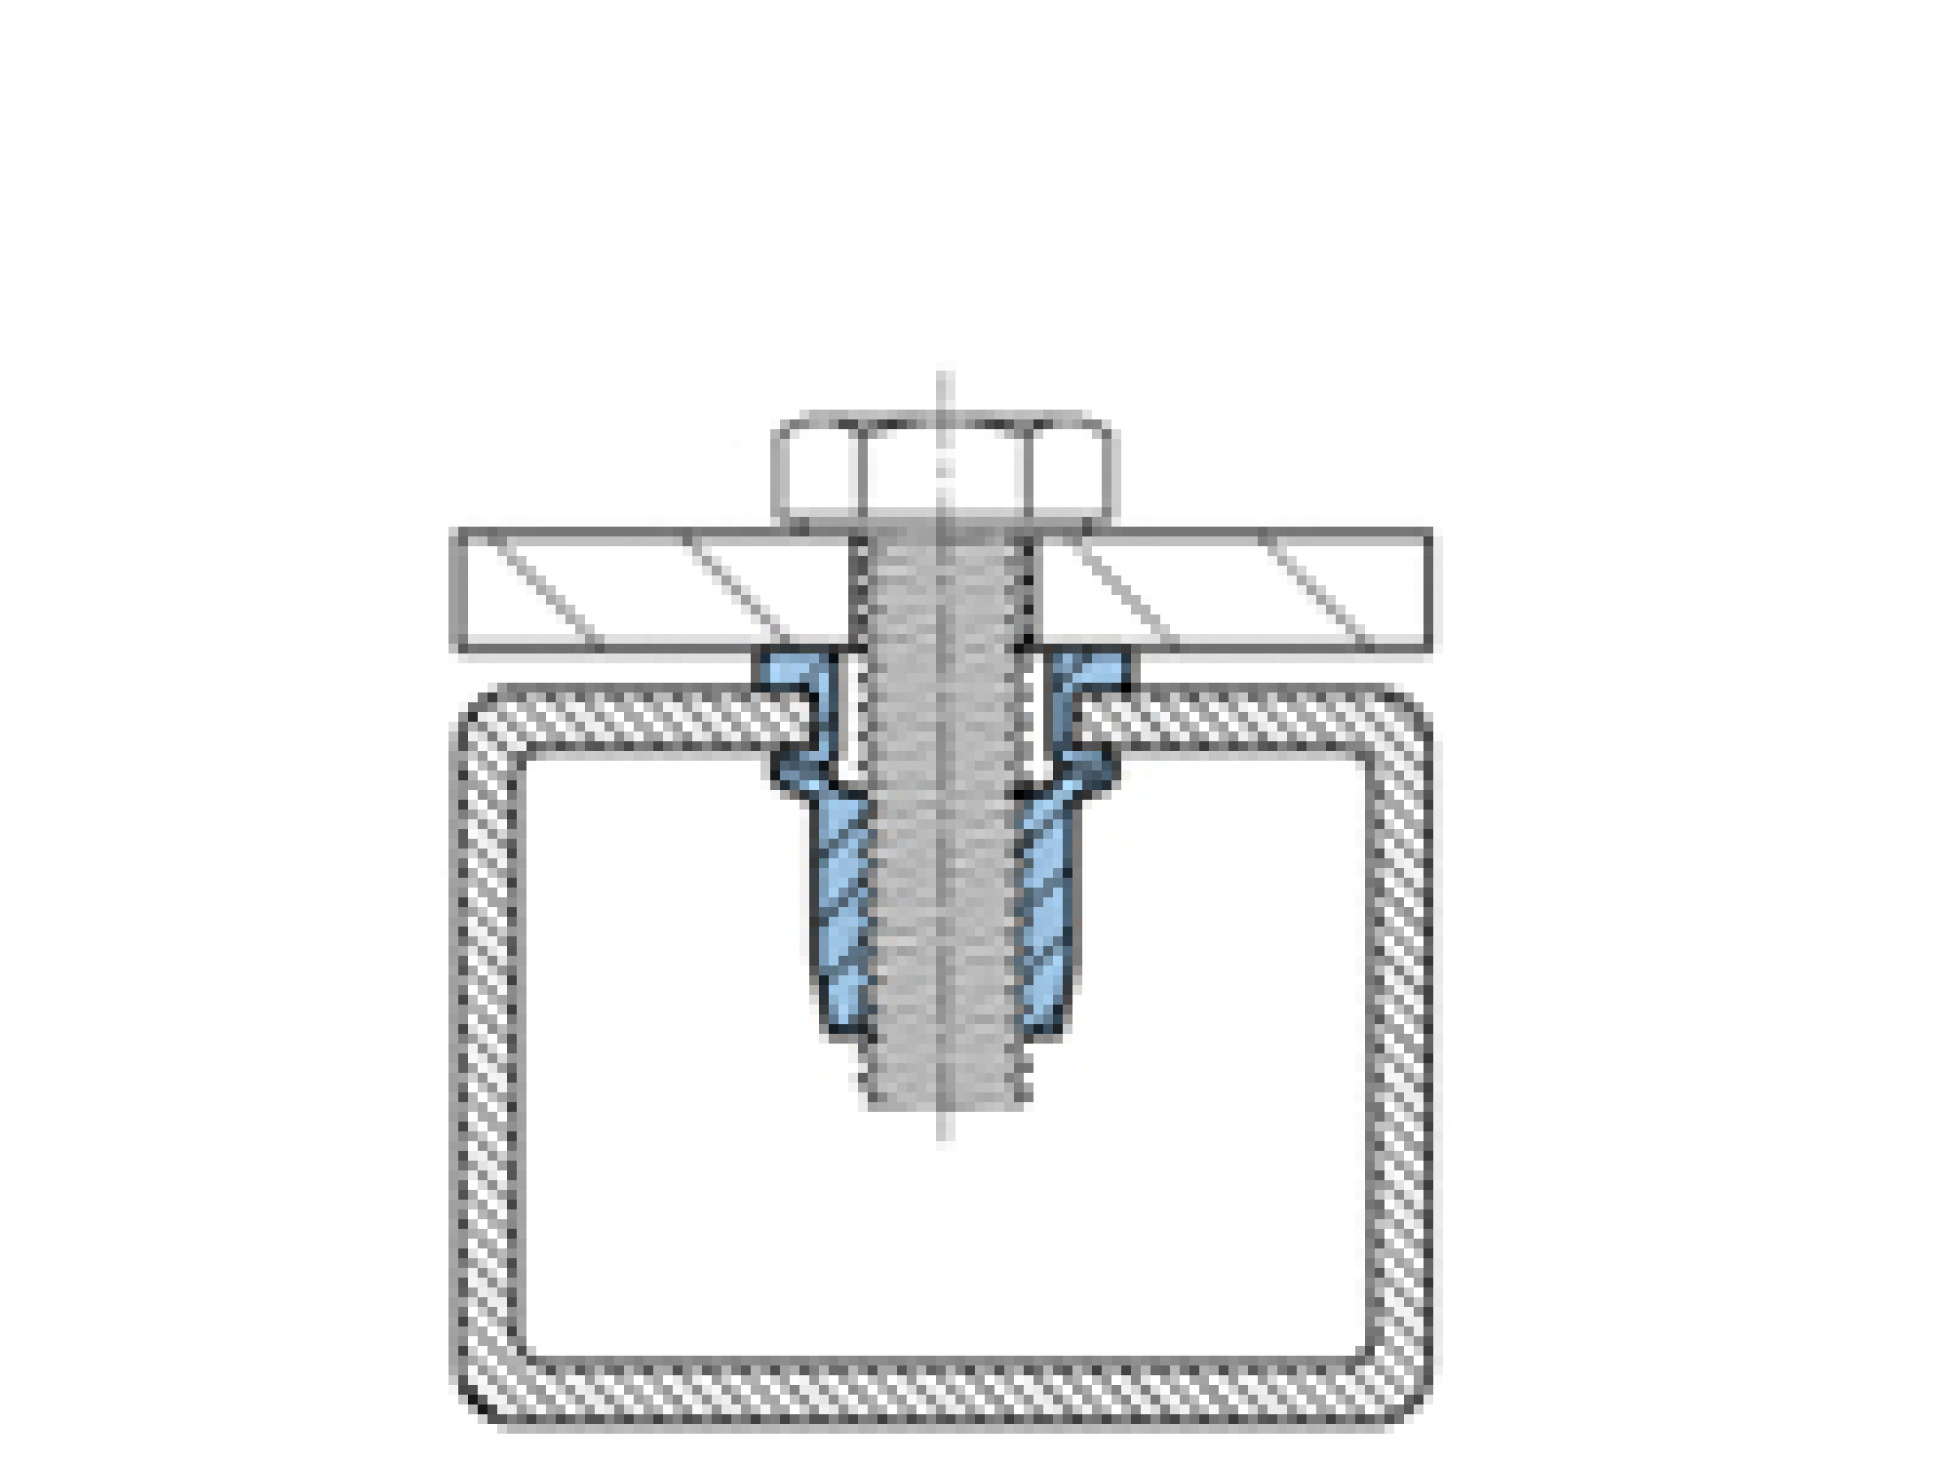
STEP 5 The Tubtara® blind rivet nut is now set. You can now easily insert your bolt or screw to assemble another component. |
 |
Countersunk heads
Are you using a Tubtara® blind rivet nut with a countersunk head? Always countersink at 90° so that the head of the installed Tubtara® protrudes about 0.1 mm above your workpiece. This ensures direct contact with the assembled component.
Don’t have the possibility to countersink? Use a low profile head.
Setting dangers
-
Oversized hole (can affect setting & torque-to-turn)
-
Burr under the hole (can impact grip range)
-
Oiled/dirty hole (can affect torque-to-turn)
-
Incorrect hole shape for countersunk head (tightening bolt will loosen the Tubtara® blind fastener)